Showing posts with label giving. Show all posts

30 December 2012

"Orphan" Christmas

We jokingly refer to our Christmas day celebration as "Orphan" Christmas.  Over the years we've collected a few souls who also have no family in town for the holidays and we have brunch together on Christmas day.

Here are our friends, Dave, Krys, P and M, who we love dearly:

IMG_5823

Here's our former housemate hamming it up with the Sprout.  They are good friends and even better enemies.

IMG_5862

In a quiet moment, listening to "princess stories".

IMG_5832_edited-1

We gave the Sprout a dollhouse for Christmas.  I bought it used from a friend and cleaned it up a little bit. It used to have pale pink floral wallpaper.  I don't know if you can tell it in the pictures, but on Christmas Eve we stayed up late painting out the pink with black chalkboard paint.  I think it's a big improvement plus we can draw on the walls any pattern we choose.

IMG_5800

More photos on Flickr for friends and family

17 January 2012

Felt Flower Pin Tutorial

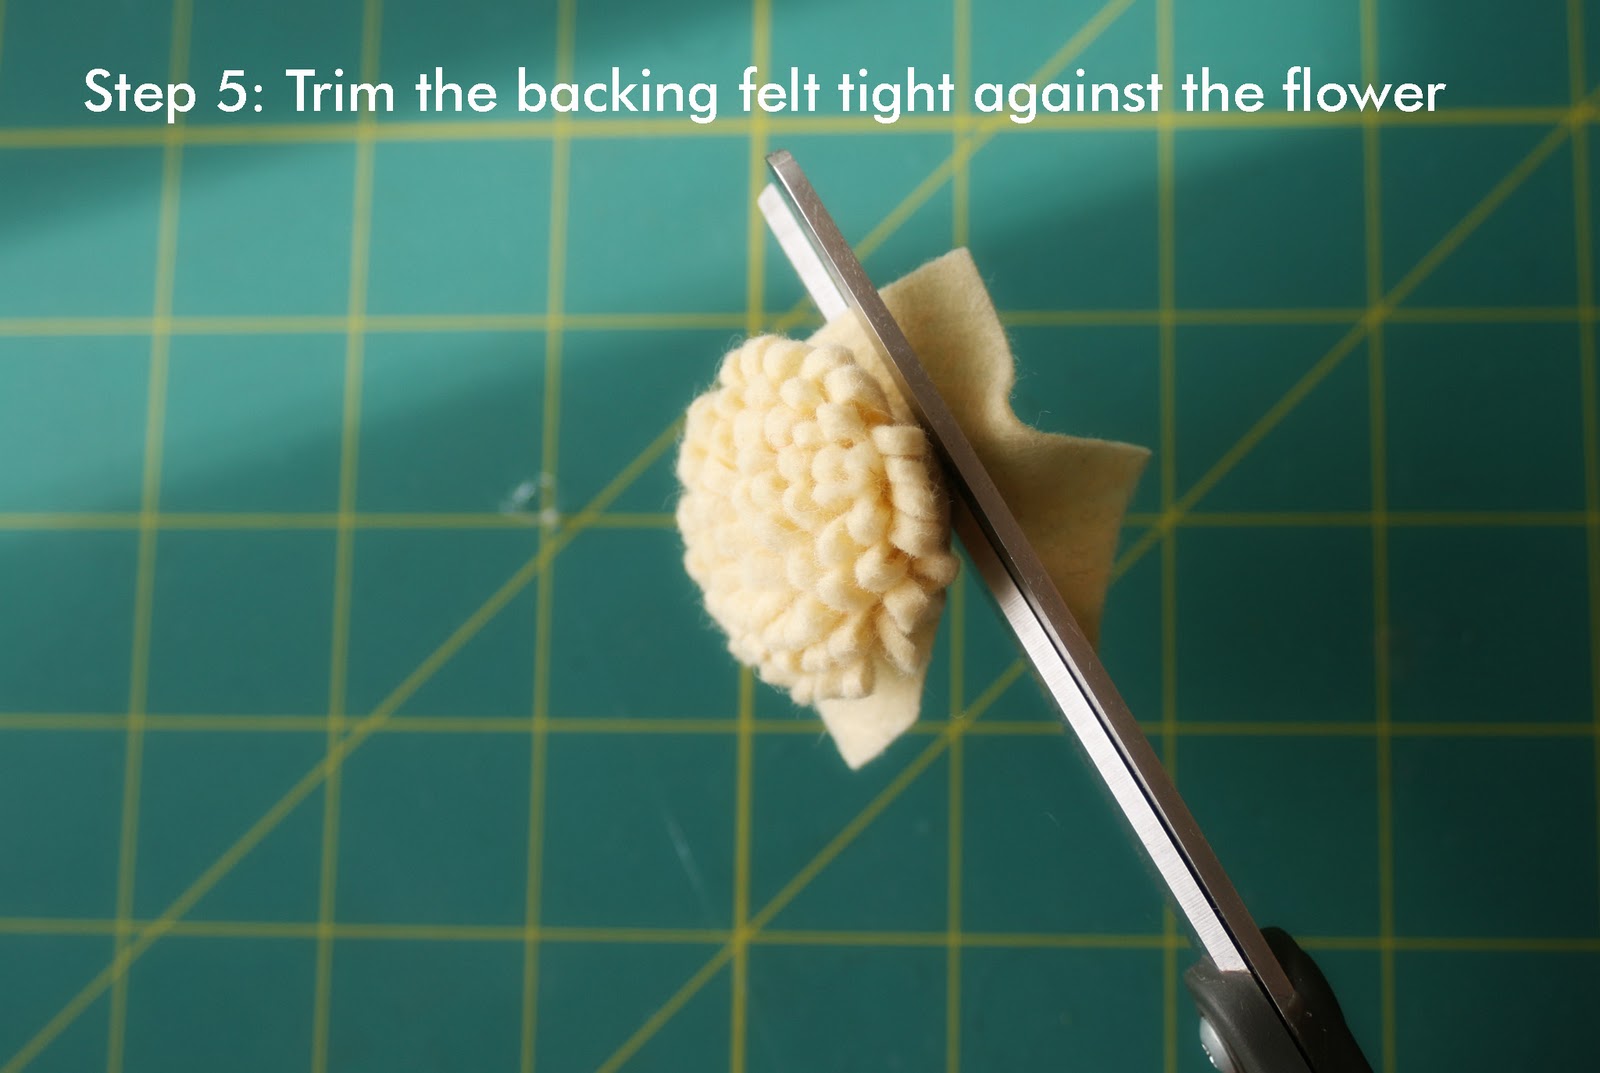
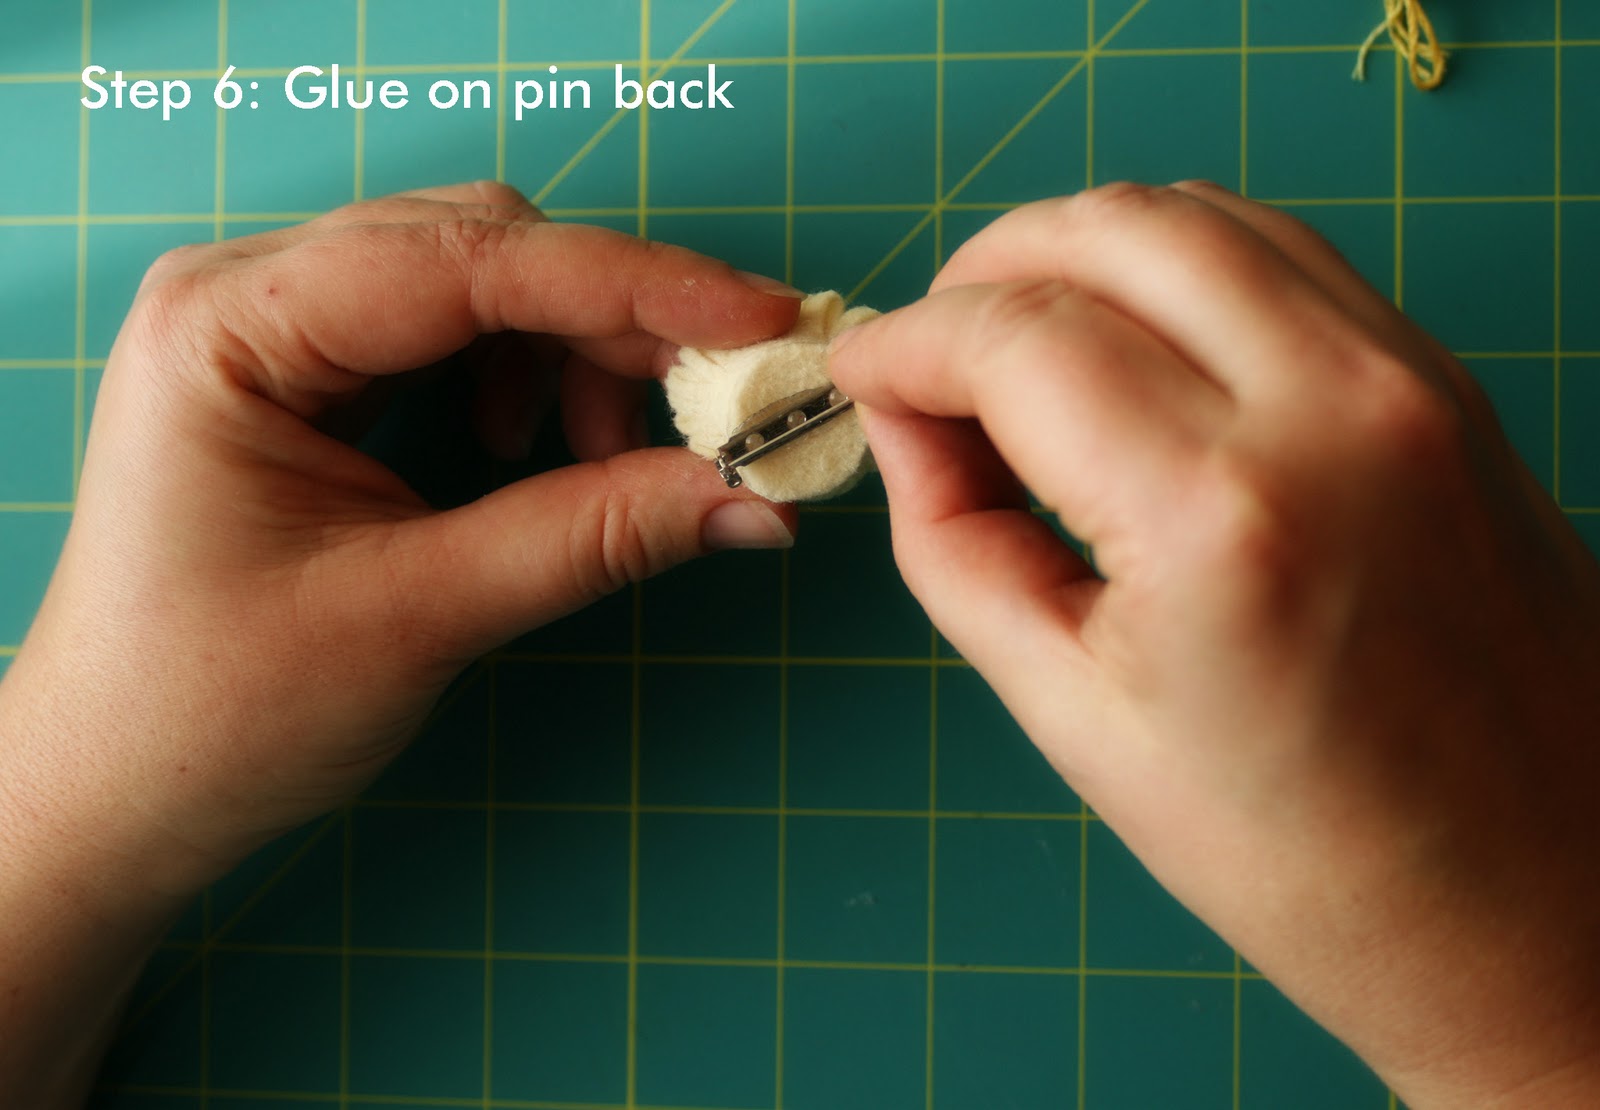
My mom just reminded me the other day that there was one more handmade Christmas gift that I never blogged about: these super easy felt flower pins.

I love an instant gratification craft, and I love a glue gun so this is the perfect little craft for me.  I made oodles of these and used them to jazz up my Christmas gift wrappings.  This is my first attempt at making a photo tutorial so please excuse the wonky bits.  Without further ado....


theme and variations:
--glue to barrette back instead of pin back
--glue several to one piece of felt to make a larger multi-flower pin or a bib necklace
--vary the size by cutting wider pedals and/or using larger strips of felt

09 January 2012

Made: Christmas Gifts

I made a few handmade gifts this Christmas, and I thought I'd share now that the giving has been accomplished. In the rush to get gifts shipped, I didn't snap many pictures so some of these photos are from my inspiration sites.

Photo from H is for Handmade
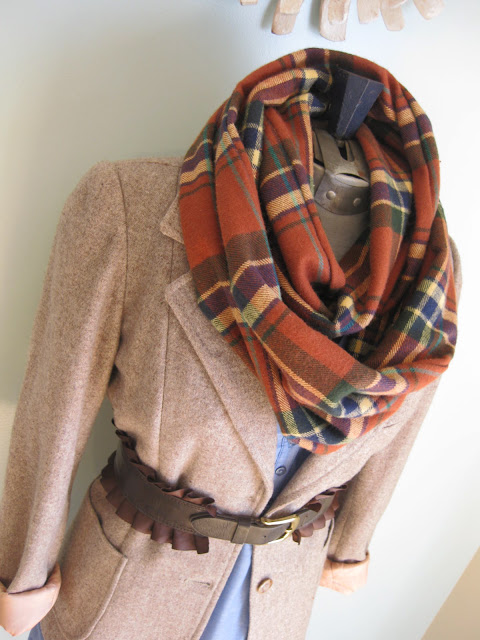
--Infinity Scarves:
When I saw this photo on Pinterest and read H is for Handmade's tutorial, I knew I had to make a few infinity scarves for my sister-in-laws and nieces. They were dead easy, and I really like how they turned out when made with soft flannels. I need to make a few more to keep. A scarf is a great way for me to layer at work as I move between schools with a variety of heating issues.
Photo from Saltwater Kids

--Indoor Camping Kit
Girls are easy to make gifts for but often my little nephews get less in the homemade gift category.  This year I was determined that at least a few of them would get a homemade gift.  I was inspired by Saltwater Kids fort kit, but took a few liberties to design my own Indoor Camping Kit using a bag we had laying around the house, some cheap IKEA sheets and a bunch of supplies from the hardware store and the dollar store.  The Wise and Bearded One even designed a logo for the bag.  I hope they are having fun with it because I had fun making it.

IMG_2843


--Sparkly Play Dough:
Play Dough has become my go-to gift for the under-5 set.  It's easy to make, the Sprout can help a little, and I'm always pleased with the results.  This time around we used two packs of Kool-Aid in each batch for color and scent, and at the end we added glitter to make the Play Dough extra Christmas-y.


made: laundry soap

--Laundry Soap
Over the holidays I renewed our homemade laundry soap supply.  I decided to share some of it with a few family members that I thought are pragmatic enough not to scoff at a Christmas gift of laundry soap :)  My basic recipe is here although lately I've been using Dr. Bronner's Peppermint Castille Soap and no essential oils since there is already peppermint in the soap.

IMG_2919

--A back quiver and arm guard
Last, but not least, is this odd little gift that didn't get finished until after Christmas.  My sister let me know that my nephew was getting a bow and arrows for Christmas and would really like a back quiver and an arm guard.  I, honestly, had no idea what I was doing but a little Googling is a dangerous thing.  I found an army green purse at Goodwill that I demolished for parts.  I handstitched all the faux-leather pieces because I was afraid to put them through my machine.  I even had enough left over for a matching wallet.  I have no idea if this quiver and arm guard actually work....I fear the quiver may be too short.  Next time I think I'll just order him something from Cabella's :)


23 November 2011

Pre-Thanksgiving Day

Well, I didn't get to any of the things I wanted to this weekend.  I was battling a cold toward the end of the week and on Saturday and Sunday, the cold was winning.  I went to the doctor.  She confirmed it was just a really bad cold (on top of the vestiges of an earlier cold) and told me to go home and rest.  So I did. 

"Resting" is interpreted in my world to mean surfing the internet from the couch for hours on end.  Here's some things I've been crushing on.  Hard.

----------

Figgy's

Once upon a time, I did some pattern testing for Patterns by Figgy's.  I even met the designer, Shelly Figuroa, in the park for a play date once, and I can attest that she is a genuinely-kind Midwestern woman transplanted to the Pacific Northwest and that her patterns are have great directions that even a beginning sewist could figure out. 

I also took a Japanese sewing class at Modern Domestic with Daniela Crane, and I know she is a talented designer and has a great eye for uniquely-modern clothing.

Figgy's is Shelly and Daniella's new collaboration of patterns. I am madly in love with this little jacket out of Pendleton wool and the dress and legging pattern. 

So many sewing patterns seem boring, uninspired or old-fashioned.  These look modern and clean to my eye.  I know part of it is the fabric selection and styling, but I am madly, madly in love with them.  Did I say that already?!

----------

Schoolhouse Electric & Supply Co. 

We have Schoolhouse Electric light fixtures in our kitchen, and I have loved their classic, utilitarian products and showroom ever since we arrived in Portland.  I heard the rumblings on the internet that they were extending their line to products for the whole house, and this week the catalog came in the mail.

Ah. May. Zing.  I want whoever styled those photos to come live in my house.  Right now.  They seem to have found that perfect mix of spare utilitarian objects mixed with warm woods and textiles that somehow reads vintage and modern simultaneously.

And it makes me all wanty inside.  You can see their catalog here. 

----------

I am quite committed to no Christmas before Thanksgiving.  But the Friday AFTER Thanksgiving is the perfect day to spend crafting homemade gifts.  In fact, I host "Craft Friday" every year on "black" Friday.  If you're a Portlander and would like to come hang out with other women and get your craft on, please leave a comment below and I'll email you my contact info. 

Today is the day to gather supplies.  If you're looking for ideas here are some DIY gifts that I've made in other years:

Quick and Easy:
Photo Magnets
Felt Barrettes

Slightly More Complicated:
Doll Maker's Kit
Freezer Paper Printed Jersey Scarves
Fizzy Bath Bombs
Natural Lip Balm
Basic Bath Salts
Freezer Paper Printed T Shirts


What are you making this year? I'm still gathering supplies and ideas for gifts this year.  I'd love to hear what you're up to.


24 December 2010

Last Minute Christmas

I've been reading blogs for the last two weeks about "last-minute Christmas" and I laugh. Last-minute Christmas does not kick in until TODAY. If you're like me, you're still putting the finishing touches on a few little gifts and you're still wrapping a few, and you're finally thinking about what you will cook or bake for Christmas day with your little family.

Here are just a few ideas if you're stuck (and some things for me to remember for next year):

IMG_8700

Last minute gifts....magnets....any pretty paper or photo could go behind a glass slide or a glass marble--courtesy of not-martha.

Simple embellishments for kraft paper gift wrap from Hege Greenall-Scholtz.

Felt gift bows from Prudent Baby.

After the last-minute scrambling today, we're dressing the Sprout up in her Christmas duds, taking her to the Christmas Eve service at church and then to a friend's house for a small celebration. Tomorrow we'll open gifts, have a nice brunch and Skype with our family scattered across the country.

I'm wishing you a Christmas filled with moments of joy that remind you that you are loved (for after all, that is the real meaning of Christmas).

30 December 2009

Post-Christmas Post #4: Grand Central Baking Day


So there's this local bakery chain called Grand Central Bakery that I just adore. I will admit to stopping there on my way to work nearly every Friday morning of the last several years for a freshly-baked blueberry muffin and a latte. They make the best muffins--so fluffy and just the right amount of sweet with a lot of sass (I've learned it's the buttermilk in the recipe).

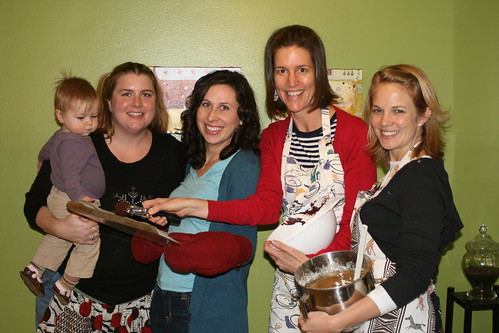
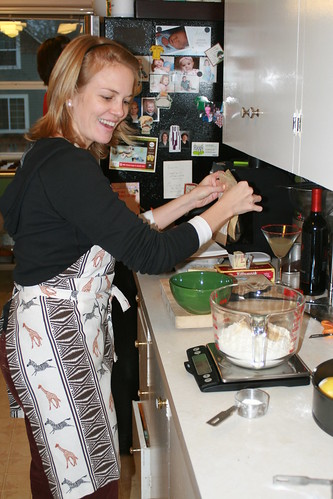
Anyhow, Grand Central recently published it's first cookbook and right away my trusty sidekick, Stacey, and I knew what we wanted for Christmas--that cookbook and a day of cooking. It didn't take much convincing to get a group of our teacher-friends into the kitchen for some baking. We made pumpkin bread, molasses-ginger cookies, the decadent triple chocolate cookies and decorated a slew of sugar cookies.

In lieu of gifts this year we had a festive afternoon of baking and whoopin' it up in the kitchen. Plus we ended up with enough treats to share. We're thinking of turning this into an annual tradition.


* * * * *


By the way, if you like cookbooks I think this one is worth checking out. The photos are frequent and good quality (always a requirement for me to chose a recipe), the directions are clear, and there are lots of additional baking tips and techniques to make the muffins, jammers, galettes, and such turn out perfectly every time.


* * * * *

I'm having some formatting issues here so if these pictures are all wanky I apologize!


29 December 2009

Post-Christmas Post #3: Doug Fir Calendar


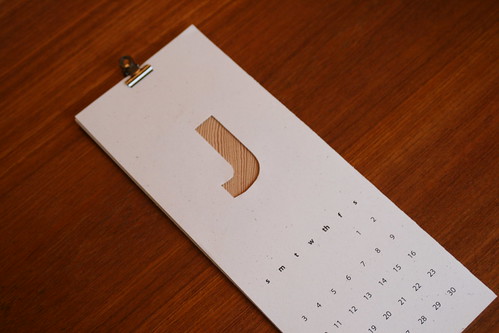
I was honored to have the Wise and Bearded One join in on the Christmas crafting this year. This is his version of A Little Hut's calendar. The calendar is a printable PDF that we purchased and downloaded. The original version has fabric or patterned paper behind the cut-outs, but my husband is obsessed with wood. So he sliced very thin pieces from some scrap fir wood that he had. The calendars turned out looking great (although our Exacto-fingers hurt afterward) plus they smelled great too!

28 December 2009

Post-Christmas Post #2: Screen-Printed Dishtowels


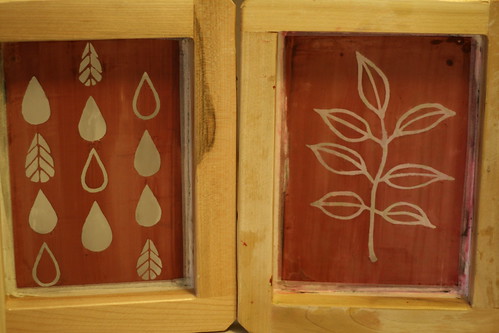
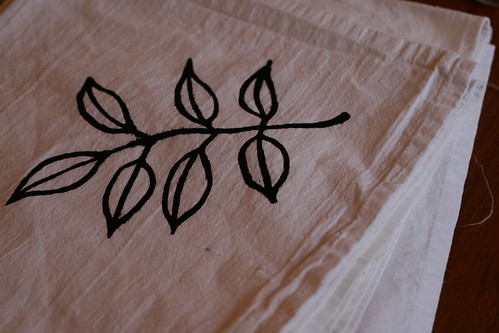
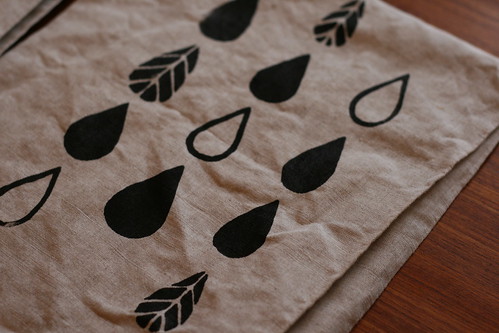
My biggest hand-made project this Christmas was a series of screen-printed dishtowels. I was inspired by the work of Sally Shim and Elizabeth Bentz, and motivated by the Crafty Women. We had a screen-printing day over Thanksgiving break and I printed about 15 dishtowels. Some were plain white pre-made towels, but my favorite were the ones I printed onto a natural cotton-linen blend and cut out and hemmed myself. I imagine that they could last a life-time.

The leaves are Ash. The droplets are rain or coffee or...whatever you imagine...but they symbolize Portland for me.

19 November 2009

Tutorial: Living Water International Christmas Tree Ornament

Now this one may seem a little odd! A water drop on the Christmas tree? You should know that part of the Advent Conspiracy is to donate some of the money we would have spent on conventional Christmas presents to Living Water International to dig wells in Africa and other less-developed countries. Living Water International exists to demonstrate the love of God by helping communities acquire desperately needed clean water, and to experience “living water”—the gospel of Jesus Christ—which alone satisfies the deepest thirst.

(I also happen to be privately amused by hanging raindrops on a Christmas tree since it seems more accurate here in the Pacific Northwest than pretty snowflakes)

YOU NEED:

-a pen

-sharp scissors

-a needle

-felt and embroidery floss

-pattern ( I drew mine by hand as seen in the bottom photo. You can make your own raindrop shapes by folding a paper in half and cutting out a shape. Folding the paper in half helps to develop an exactly symmetrical water drop shape. Adjust until you have a shape that you are satisfied with. My large raindrops were approximately 3 1/2 inches wide by 5 inches tall. My small water drops were about one inch smaller all around.)

DIRECTIONS:

1. Cut out pattern pieces.

2. With a pen, trace the water drop shapes onto the felt. Cut two felt water drops from each size. To avoid having the ink marks show, cut just inside of the ink line you traced.

3. Carefully split the embroidery floss in half. It is much easier to sew with 3 strands than with 6.

4. Center one small water drop on the larger drop. Stitch around the edge of the smaller drop to attach it to the larger drop. Repeat with the second set of water drops.

5. Embellish the front with any additional stitching. If you know some fancy stitches this would be a good place to show them off. Or you could stitch the year or the recipient’s name.

6. Stack the water drops together with the decorated sides out. Stitch around the edges through both pieces of felt. Be careful to tuck all knots and thread ends between the two pieces of felt.

7. Tie a loop at the top of the water drop so an ornament hanger can be attached.

8. Go to https://www.water.cc/ to make a donation to Living Water International.

9. Give this ornament to a friend or family member with a card explaining the mission of Living Water International and how, in lieu of a traditional Christmas gift, you’ve chosen to provide clean water and the gospel to those in need.

Tip: I embroidered my raindrop with pale green and pale gold embroidery floss. However, I think they would be stunning with bright blue or turquoise stitches.

18 November 2009

Tutorial: Felt Cuppa Joe Pins

GIVEAWAY!!! GIVEAWAY!!!


Comment on this post and you could win one of three kits with all you need to make 2 Cuppa Joe Pins this Christmas season. Just write a comment about your favorite warm winter beverage! I'll pick three random comments on Sunday. That is, if there ARE more than three comments! Is anyone out there? Anyone? (Bueller?)

I'll post the directions for the "losers" in the vain belief that there are more than three readers out there who might want to make some pins themselves.

FELT CUPPA JOE PINS

YOU NEED:

-a pen, sharp scissors, a needle

-scraps of red (or blue), brown, and white felt and embroidery floss

-pattern (I hand drew mine so I don't have a "digital" version. You can try printing the photo or you can draw your own if you'd like. It's about 2 inches across at its widest point.)

-pin backs (you can buy these in the jewelry section at your JoAnn's, Michael's or other craft stores)


DIR
ECTIONS:

1. Cut out the pattern pieces.

2. With a pen, trace the mug pattern on to the red (or blue) felt and cut two. Carefully cut out hole in the mug handle.

3. Trace the coffee pattern on to the brown felt and cut one.You may also chose to cut marshmallow shapes from the white felt.

4. Carefully split the embroidery floss in half. It is much easier to sew with 3 strands than with 6.

5. Sew the coffee shape to the front of one mug shape. Embellish the front with any additional stitching or felt marshmallows.

6. Sew the pin back to the back of the second mug shape.

7. Stack the front mug on top of the back mug. Stitch around the edges through both pieces of felt. Be careful to tuck all knots and thread ends between the two pieces of felt.

8. Give it away.


***Relational Giving Ideas:

Give a pin to a friend with an invitation to meet up at her favorite coffee shop for a long conversation.


Know a busy mom?
Give her a pin with a gift certificate to her favorite coffee shop and an offer to babysit so she can take a mini-vacation.

P.S. Please excuse the crappy quality of these pictures. The dark winter evenings are the bain of my existence here in Portland, Oregon. I hate "flashy" photos so I just set the camera settings to compensate for the low light as best as possible. Someday I'll have one of those fancy flashes that I can point up at the ceiling to get some nice diffuse lighting. Someday.

17 November 2009

Tutorial: Felt Flower Barrettes

The felt flower barrettes were by far the favorite item of the folks who stopped by my DIY Fair table. Several people sat down and made barrettes on the spot. Others grabbed the directions and supplies to make their own at home. Here's a tutorial in case you'd like to make some too.

YOU NEED:
  • a pen, sharp scissors, a needle, red and pink felt, and embroidery floss
  • barrettes--the silver clip kind that are sort of long triangles like these
  • pattern (I hand drew mine. You can try printing it from the picture. It is about 1 1/2 inches wide--just wide enough for the barrette to fit securely between two flower petals with about 1/8th inch extra on each end. The center circle is about the size of a dime.)

DIRECTIONS:

1. Cut out pattern pieces.

2. With a pen, trace the flower pattern on to the red felt and cut two.

3. Trace the circle on to the pink felt and cut one.


4. Carefully split the embroidery floss in half. It is much easier to sew with 3 strands than with 6.


5. Sew the pink center to the front of one red flower shape.
Decorate the front with any additional “fancy” stitching desired.


6. Sandwich the barrette between the front flower and the back flower. Cut a small slit through the back flower for the barrette clasp to go through.

7. Stitch around the edges through both pieces of felt. Be careful to tuck all knots and thread e
nds between the two pieces of felt.


8. Give it away.


***Relational Giving Idea:

Give a barrette to your favorite little girl with an offer to get dressed up and go dancing with her (in your living room to her favorite songs).


These barrettes are not my original idea. My friend, Stephanie, graciously shared the idea with me. She has made all sorts of cool barrettes--trees, monkeys, guitars, etc.--for her favorite little girl.


P.S. Heather Jane, this is definitely a project you could do with your girls!

28 September 2009

More Owl Fabric

P1040920

Miss A. , the daughter of the lovely and talented Rachel Austin, had her first birthday party last month. I didn't have much time at my disposal but I knew I wanted a handmade gift for this special little girlie (and the Sprout's first party invitation, no less). So here's a quickie birthday gift--the Lazy Day's skirt in my favorite owl fabric with another little owl zigzagged onto a gently-used shirt.

My husband grimaced when he realized I'd repurposed a garage sale purchase as a birthday gift. Knowing Rachel's appreciation of thrift and craft, I feel pretty safe. What do you think? Is it tacky to give a recycled gift?

27 June 2009

Made: Huck Finn Pants and Yard Sale Skirt


I bought Heather Ross's lovely Weekend Sewing book well before the Sprout was born because it was so beautifully photographed and designed. I paged through it over and over again thinking of the projects I would make out of it, but I had no energy and, dagnabbit, my belly got in the way of the sewing machine.

So I put the book away until this spring when I made the Lazy Day's skirts for my nieces and I needed a pants pattern for my little nephew. Out came Weekend Sewing and the Huck Finn pants pattern. It's a sweet, simple pattern and went together very quickly. I liked Heather's idea of putting buttonholes in the elastic waistband so the pants can be adjusted as the little boy grows. I haven't heard anything from my sister so I'm assuming that the pants are working....huh, sis?

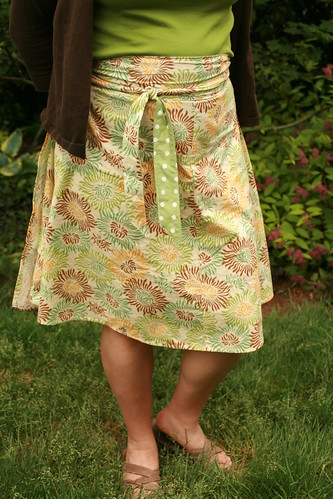
Then I decided to tackle the Yard Sale Skirt. I had read enough comments from other sewing bloggers to know that this pattern has some issues---namely that 6 panels weren't wide enough to cover most women's heinies and so people were adding a 7th or even an 8th panel. I wanted to use fabric that I had lying around (a couple of yards of Heather Bailey's Fresh Cut) and I didn't want it to be TOO full so I decided to alter the pattern and make each panel a little wider at the waist. I'm a little wider at the waist these days having not entirely returned to my pre-baby shape (and that was not too trim to start with). So I thought widening each panel would do the trick.

It did. Sort of.

I don't know what's up with this skirt, but I just don't like it. I think part of it is the fabric...needs to be washed about 30 more times before it is nice and limp and summer-y. I think part of it is my pattern alteration that made it less "swooshy" of a skirt. And I think a lot of it is just that I don't like how this pattern emphasizes the waist which is my least favorite body part at the moment. Sigh....

To compensate for my dissatisfaction with the skirt, I used the scraps to make a cunning little kimono for the Sprout using Habitual's pattern. You can see her picture here. She does not have body issues. Thank goodness.

Despite my lack of enthusiasm for the yard sale skirt, other folks have been really happy with it and with the Weekend Sewing book in general. There are a couple of other projects I'd really like to try out of it, so...I will venture forth into Weekend Sewing again soon. And maybe I'll even take a second shot at the Yard Sale skirt.

05 May 2009

Made: Lazy Days Skirts


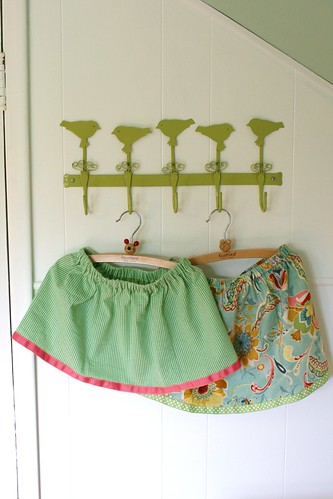
I have some fabric that has been sitting on my work table for almost a year now. Some fat quarters of "girly" fabrics that I meant to make into some summery clothes for my nieces LAST spring and then I got pregnant and tired and unmotivated. So..... I need to clean my work table and rather than fold the fabric neatly and reshelve it, I made some skirts for the girls.

This is the free Lazy Days skirt pattern from Liesl at Oliver + S. It is super easy with the ribbon doing all the hem work at the bottom of the skirt. I think each skirt took about 30 minutes total. I do most of my creative work between 9:00 and 11:00 at night and baby is sleeping those hours these days so I'm managing to wedge in a few projects between loads of laundry, dishes, catching up on email and facebook, etc.

31 December 2008

Made: Doll-Making Kit


IMG_0714
Originally uploaded by ndmiller
Ok, so I didn't actually MAKE anything in this gift, but it was one of my favorite gifts to put together. When I was a kid, my mom would make doll clothes and all sorts of miniature items for my dolls. She has a pretty serious artistic streak herself, but sometimes she needs a little encouragement to get it out there.

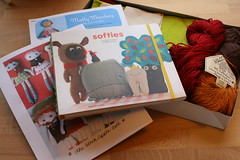
I thought that now that she has almost-3 granddaughters and a grandson she might want to get crafty again. I bought the Softies book and then I printed out the Black Apple Doll Template and the Molly Monkey Pattern from the internets. I packaged them in a box with some yarn that will make perfect "hair" and some fabric scraps and bunch of felt that I picked up for cheap at the thrift store.

I am not-too-secretly hoping that my mom will make a dolly or two for the Sprout.

Made: Freezer-Paper Printed Jersey Scarves

Ackkk! It's almost the new year and I haven't finished blogging about Christmas yet! In part, that's because I was waiting for all of my packages to get to their recipients. With the snowpocalypse here in P-town, it seems like the mail and UPS got very far behind. But hopefully all the packages have been delivered by now!

Remember my friend Stephanie's No-Sew Jersey Scarves? Well, I loved them so much and they seemed so simple so I bought a bunch of really soft jersey knit. I knew I wanted to embellish them in some way but couldn't figure out how I wanted to do it. I tried some free-motion sewing machine embroidery but...well, let's just say it was a complete and utter failure.

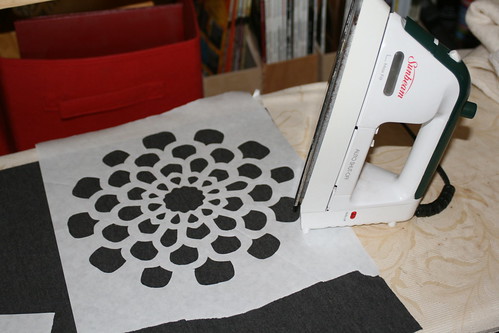
So I fell back on a tried and true method--freezer paper printing. I've been obsessing about the Lena Corwin Printing by Hand book so I was playing around with different printing ideas in my head. I printed a few with sort of an abstract pinwheel/snowflake design but I wasn't too happy with it.

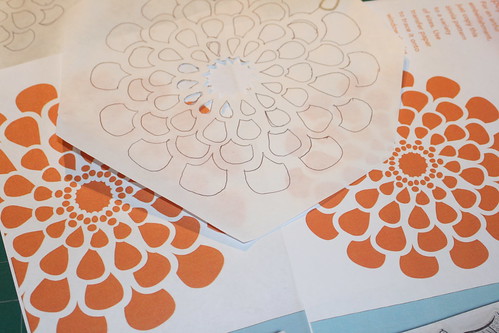
I remembered some snappy dahlia prints I'd seen in Mary Englebreit's Home Companion a couple of months back. The dahlia print was just the thing I was looking for. But, oh, the aching back and the exacto-knife-finger! It's no fun to repeatedly cut out a detailed design. I had to come up with a different method before my hands turned into the gnarly knuckles of an old crone!

And then I had what is quite possibly my most brilliant thought in a very long time (obviously, I don't have many brilliant moments): I recalled elementary school arts and crafts and the wonders of the six-sided snowflake. I realized I could fold the freezer paper in 6ths just as you would to cut a snowflake and then I could cut my rounded dahlia petals with a small scissors in 6-licate. Yay! No more exacto-knife-finger!

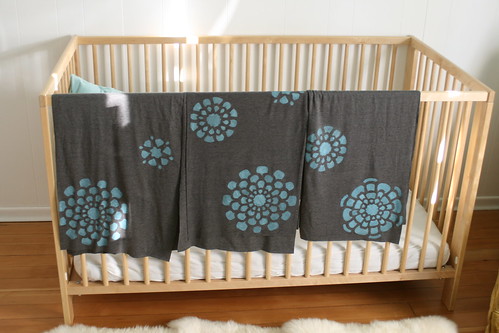
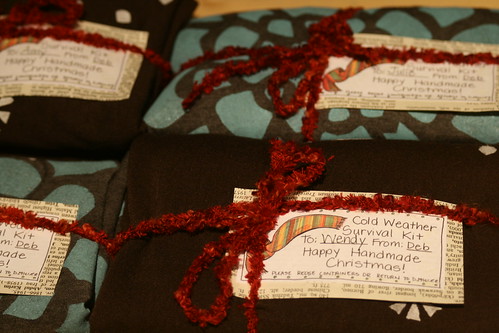
I printed several different color ways. I can only find the photos of the blue on grey version drying on the crib (yes, a crib, be warned that blogging about about baby crap is in the near future). I wrapped up some of the scarves with the natural lip balms and other products the Crafty Women had made for "Cold Weather Survival Kits".

Followers